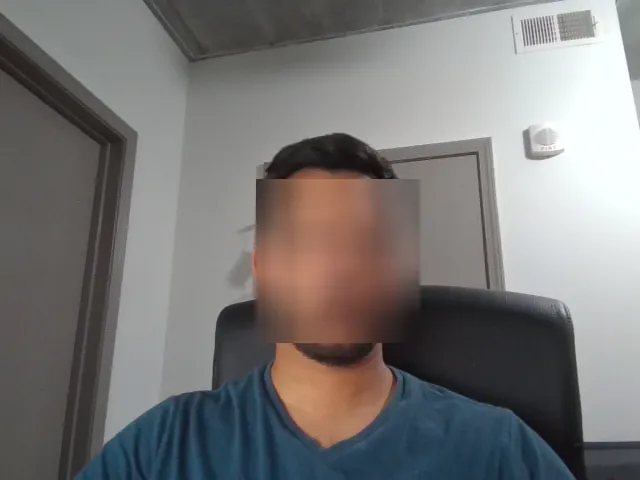
Facial Blurring
Facial Blurring in Live Video Feeds: An OpenCV Implementation
Introduction
In the digital age, privacy and security are paramount. With the proliferation of surveillance and live video feeds in public and private spaces, the need to anonymize individuals in real time has become increasingly important. This Medium article delves into a Python code implementation for facial blurring on live video feeds. It highlights its significance, applications, and a guide to extending this functionality for simultaneously processing multiple images. This is a simple OpenCV implementation. Here, I have used a face detector named the Haar Cascade model.
Paul Viola and Michael Jones introduced them in their paper “Rapid Object Detection using a Boosted Cascade of Simple Features” in 2001. The technique is particularly well-known for its effectiveness in detecting faces within images, though it can be trained to identify almost any object.
The Haar Cascade algorithm uses a machine-learning approach to train a cascade function from many positive and negative images. Positive images contain the object of interest (e.g., faces), while negative images are those without. Haar Cascades, while powerful, are known for being fast rather than highly accurate, especially in comparison to more modern deep learning approaches. However, their speed and ease of use continue to make them popular for real-time face-detection tasks, particularly in resource-constrained environments where computational efficiency is critical.
The Code Explained – The provided Python script uses the OpenCV library to detect faces in a live video feed from a webcam and applies a blurring effect to anonymize them. OpenCV is a powerful library for image processing and computer vision tasks.
Here’s a step-by-step breakdown:
1
import cv2
Load the Haar Cascade Model: A pre-trained model to detect faces. It’s efficient and widely used for real-time face detection.
1
model = cv2.CascadeClassifier('haarcascade_frontalface_default.xml')
Let’s move on to video capture: It starts capturing video from the webcam.
1
cap = cv2.VideoCapture(0)
Infinite Loop for Video Frames: Continuously captures and processes each frame from the video feed.
1
2
3
while True:
  ret, photo = cap.read()
  gray = cv2.cvtColor(photo, cv2.COLOR_BGR2GRAY)
Face Detection: Converts each frame to grayscale (for efficiency) and detects faces using the Haar Cascade Model.
1
face = model.detectMultiScale(gray, 1.3, 5)
Blurring Faces: For each detected face, the script calculates the coordinates, applies a blurring effect, and overlays it back onto the frame.
1
2
3
4
5
6
7
8
9
10
11
12
13
14
if len(face) == 0:
    pass
else:
    # x1, y1, x2 ,y2 coordinates of model (rectangle) around the face
    x1 = face[0][0]
    y1 = face[0][1]
    x2 = face[0][2] + x1
    y2 = face[0][3] + y1
    # 4 Co-ordinates around the Face i.e x1, y1, x2 ,y2
    coord_img = photo[y1:y2 , x1:x2]
    #Function to Blur of those coordinate points
    blurImg = cv2.blur(coord_img, (50,50))
    # make the blur to apply on image
    photo[y1:y2 , x1:x2] = blurImg
Display and Exit: Shows the processed video feed and breaks the loop when the Enter key is pressed.
1
2
3
4
cv2.imshow("Video Window",photo)
  # Key press ENTER to exit the loop
  if cv2.waitKey(100) == 13:
     break
Blurred Image
The Motivation Behind Facial Blurring
Facial blurring in live video feeds serves several purposes, chiefly privacy preservation in public spaces. It ensures the anonymity of individuals in various scenarios like live streaming, surveillance footage, and public broadcasts. This technology addresses concerns about consent, identity protection, and compliance with privacy laws.
Use Cases
- Public Surveillance: To maintain public safety without compromising individual privacy.
- Live Streaming Events: Anonymizing attendees or passersby in real-time broadcasts.
- Video Conferencing: Providing options for participants to blur their backgrounds or faces for privacy.
- Data Collection and Analysis: Researchers can anonymize faces in datasets to ensure privacy compliance.
Extending the Functionality for Multiple Images
To adapt the script for processing a batch of images instead of a live video feed, we can modify it as follows:
1
2
3
4
5
6
7
8
9
10
11
12
13
14
15
16
17
18
19
20
21
22
23
import cv2
import os
def blur_faces_in_images(input_directory, output_directory):
    model = cv2.CascadeClassifier('haarcascade_frontalface_default.xml')
    images = [f for f in os.listdir(input_directory) if os.path.isfile(os.path.join(input_directory, f))]

    for image_name in images:
        image_path = os.path.join(input_directory, image_name)
        photo = cv2.imread(image_path)
        gray = cv2.cvtColor(photo, cv2.COLOR_BGR2GRAY)
        faces = model.detectMultiScale(gray, 1.3, 5)

        for (x1, y1, w, h) in faces:
            roi = photo[y1:y1+h, x1:x1+w]
            blurImg = cv2.blur(roi, (50,50))
            photo[y1:y1+h, x1:x1+w] = blurImg

        output_path = os.path.join(output_directory, image_name)
        cv2.imwrite(output_path, photo)
# Example usage
input_dir = 'path/to/input/images'
output_dir = 'path/to/output/images'
blur_faces_in_images(input_dir, output_dir)
This modified code reads images from an input directory, processes each image to blur faces, and saves the processed images to an output directory.
Conclusion
Facial blurring technology is a bulwark for privacy in an era of ubiquitous video capture and surveillance. It harmonizes the benefits of video technology with the fundamental right to privacy. Developers and technologists can contribute to a more privacy-conscious world by understanding and applying such techniques.
Check my Github repo as I build more functionalities over the next few weeks:
This post is licensed under CC BY 4.0 by the author.
